Ad – The article contains affiliate links to Kjell.com. The content of the article is my own opinions, independent of this.

In this article, I will guide you through the process of integrating Cleverio Smart Mini Plug IP100 into Home Assistant. This plug provides a cost-effective way to automate lights and other devices in your home. It’s worth noting that Cleverio is a rebrand of Tuya and uses the same framework.
What You Need
- Cleverio Smart Mini Plug IP100 – Can be bought here
- A device with Home Assistant installed
- Smart Life – Smart Living app
- A stable WiFi connection
Setting Up Cleverio Smart Mini Plug IP100
- Download and install the Smart Life – Smart Living app on your smartphone.
- Create an account in the app if you don’t already have one.
- Add Cleverio Smart Mini Plug IP100 by pressing the + sign in the app and following the instructions. Remember to hold the button on the plug for 3 seconds until it starts blinking blue to make it visible.
For more details, check this post: Cleverio Smart Mini Plug IP100
Integrate with Home Assistant
Open the Home Assistant dashboard on your device.
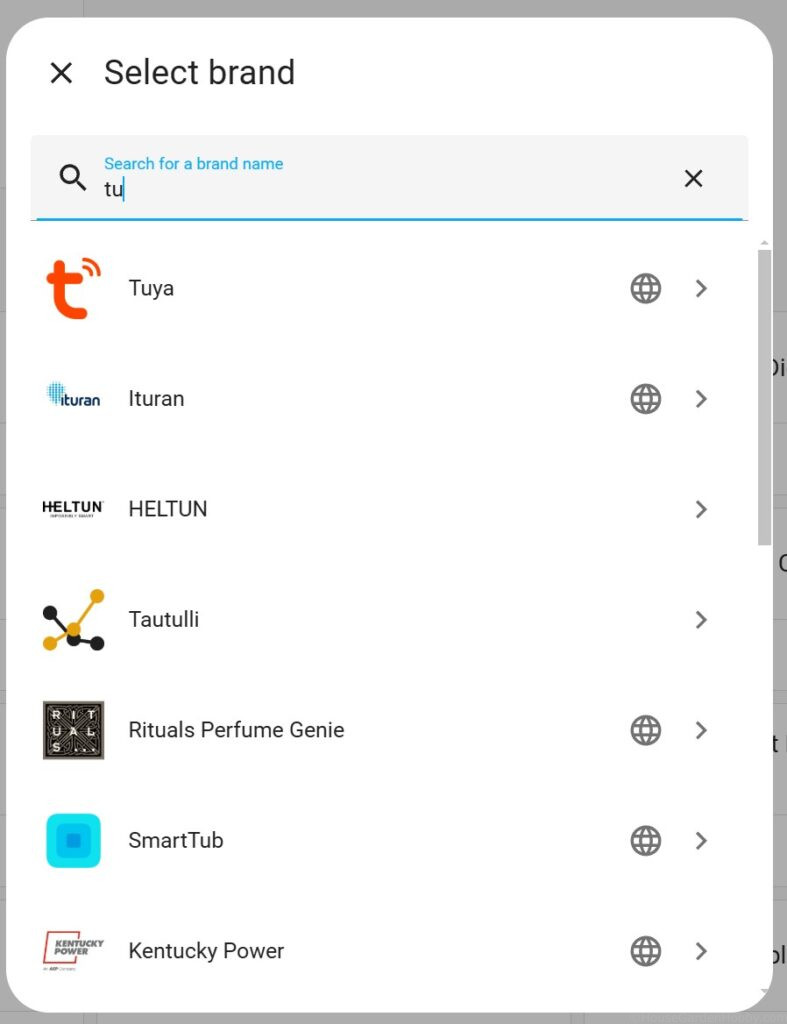
Navigate to the Settings, choose Devices & Services, and then click on + ADD Integrations. Search for “Tuya”.
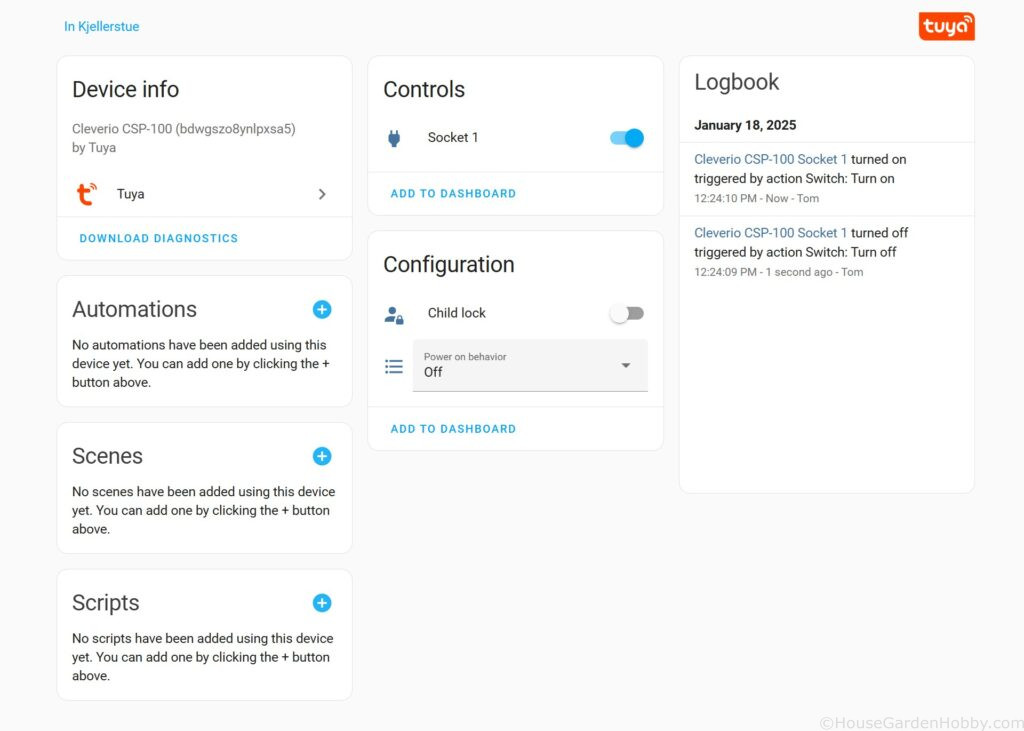
Once the integration is complete, you should see Cleverio Smart Mini Plug IP100 in the list of available devices.
When you click on Tuya, a QR code appears. Finding the QR code scanner in the app was easier said than done.
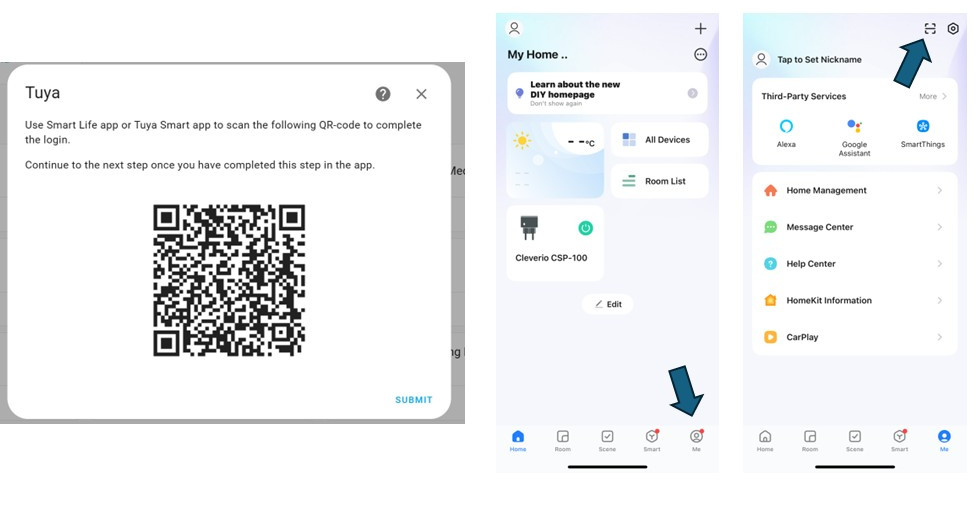
First, go to “Me” and then you can find the scanner in the top right corner.
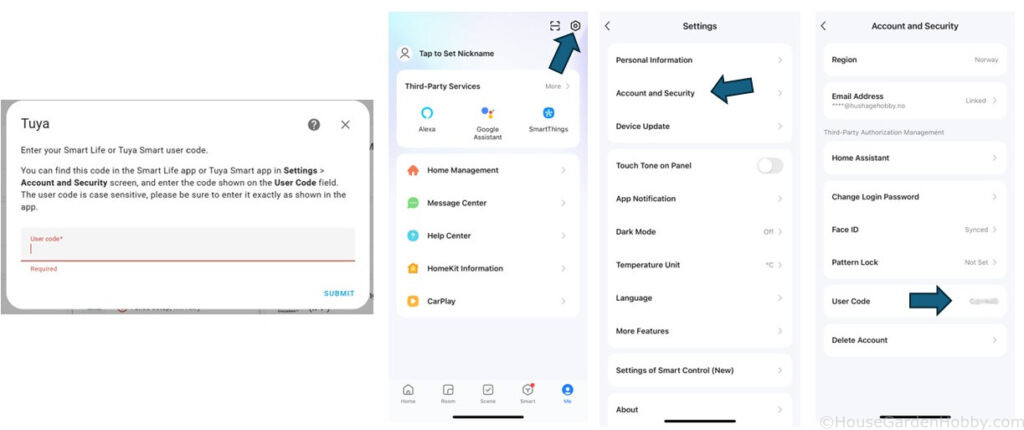
After the QR code is scanned, you need to enter the User Code. You can find this under Settings, Account and Security, and then under the field User Code. This is case sensitive, so be sure to pay attention to uppercase and lowercase letters.
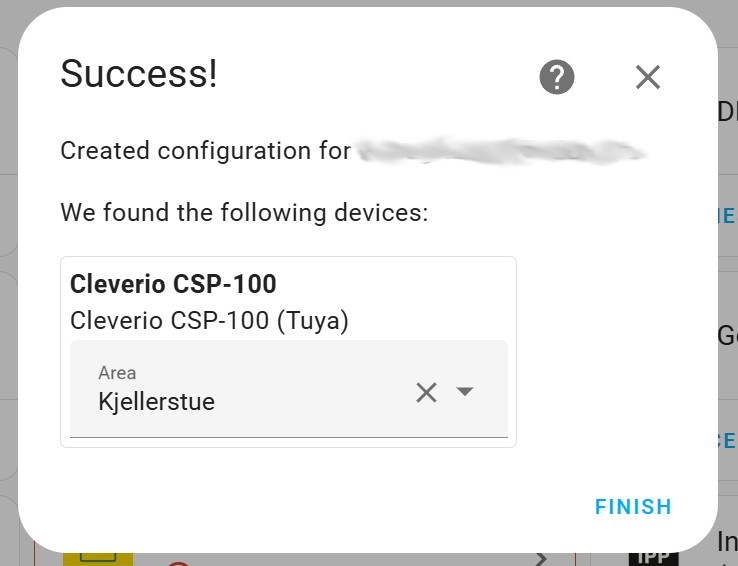
If everything is done correctly, you’ll see a screen where you can choose which area the found device is in. In my case, Basement Living Room. When you press Finish, the device is ready to use in Home Assistant.
Automation
My goal is to have the light turn on and off together with the other ceiling light in the basement living room. This will be achieved through automation. In practice, this means that when I press the light switch to turn the other ceiling light on or off, Home Assistant will monitor this and send the on or off command to the Cleverio plug.
Click on the + after the Automations heading
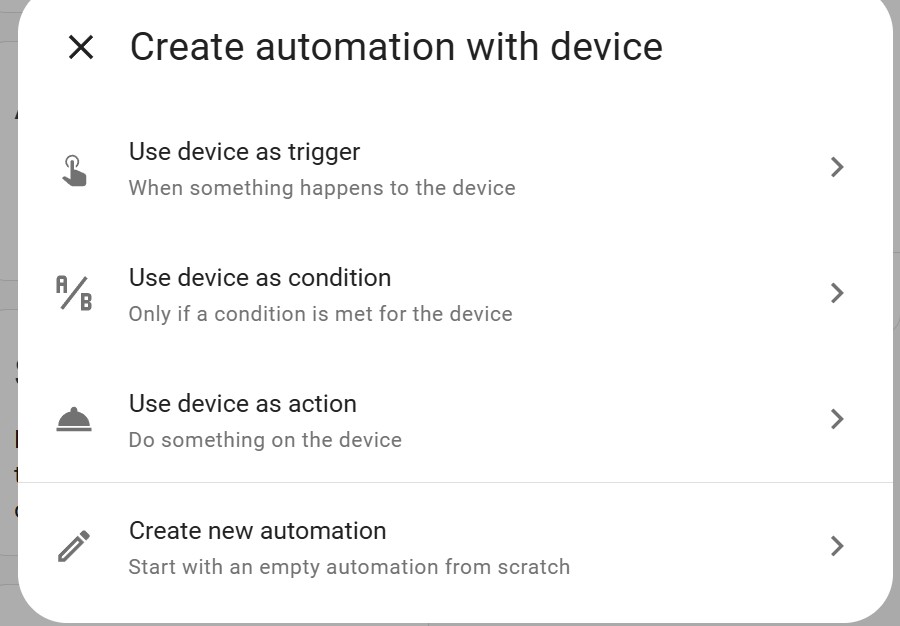
Choose Use device as action,
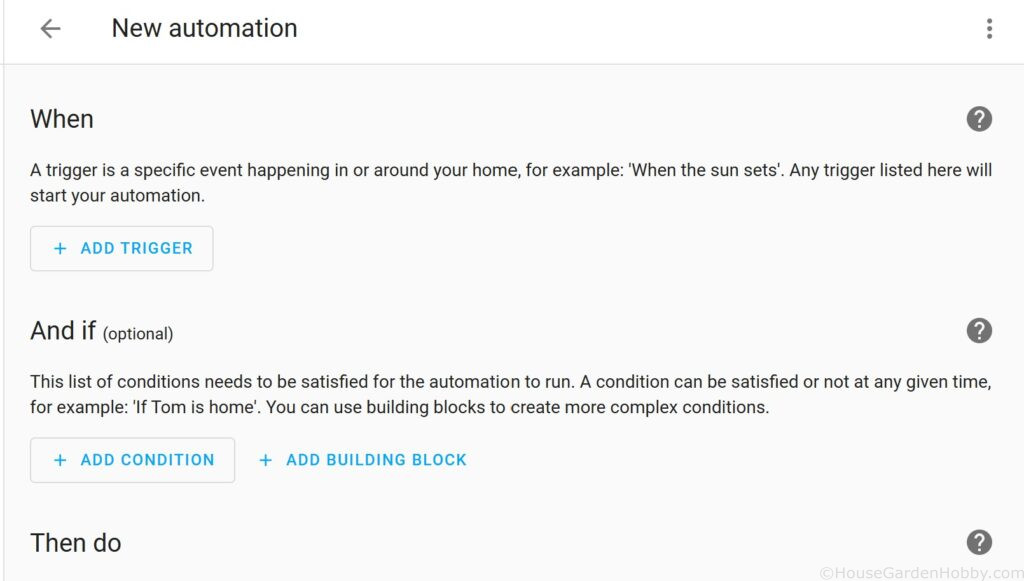
To add the source that will trigger the automation, press + Add Trigger.
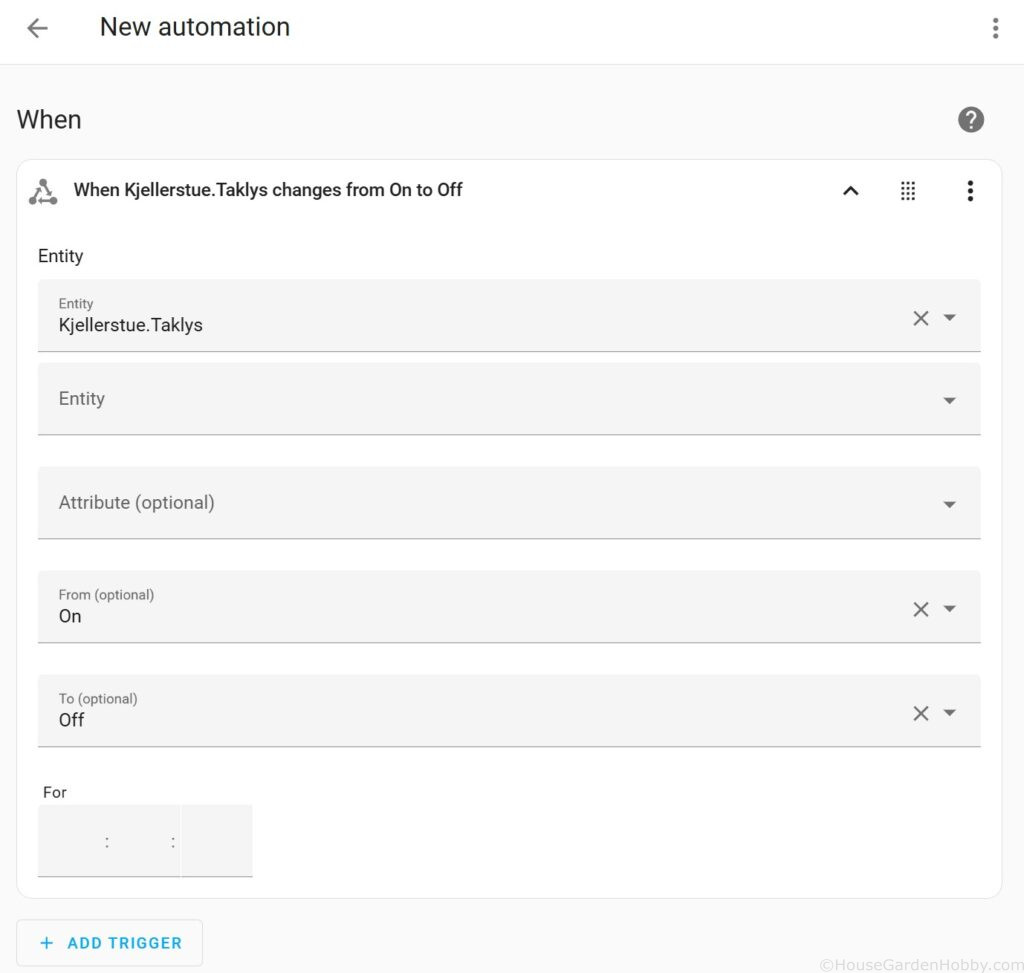
In my case, the entity is named Kjellerstue.Taklys. So, when it goes from On to Off, the automation will start.
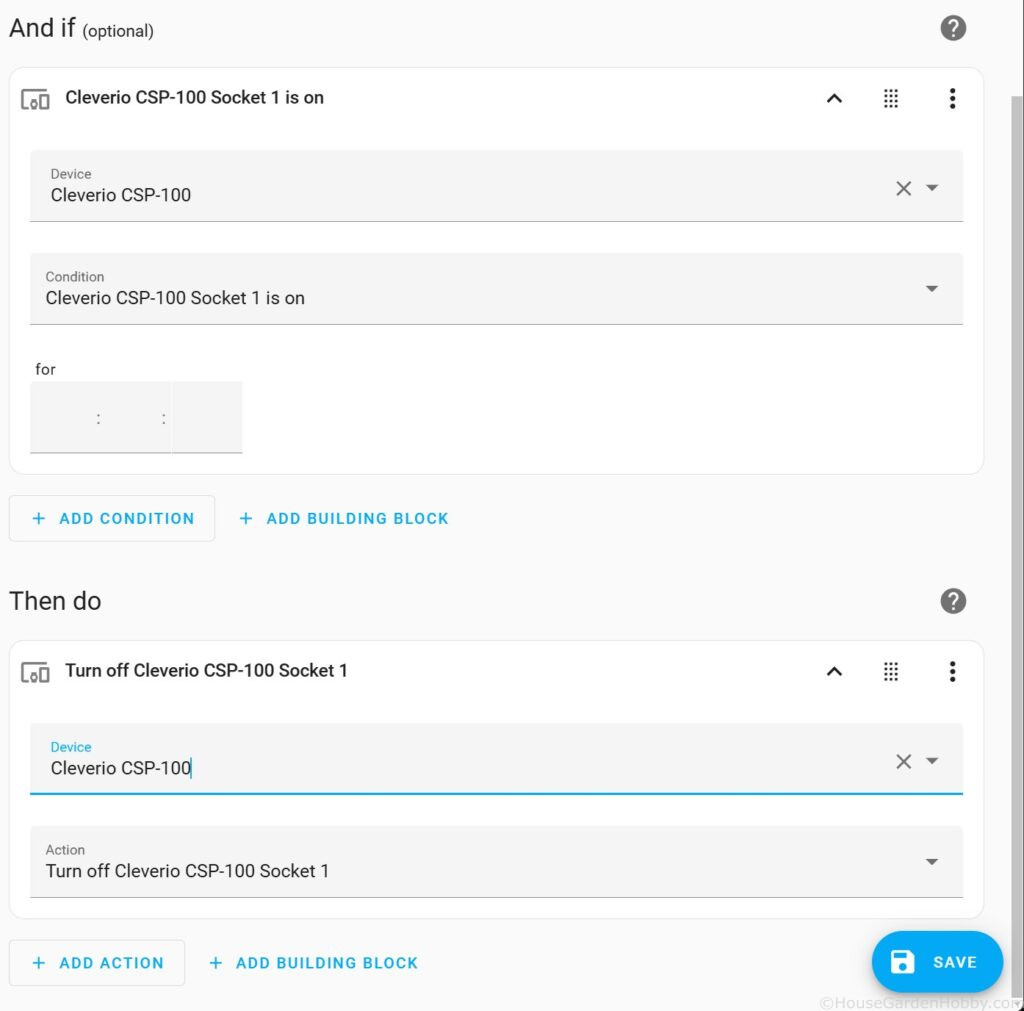
I chose to add an “And if” condition as well, so the automation will only execute when the plug is in the “On” state.
The “Then do” section defines what should happen next. Here, select the device and the action “Turn off”.
Press Save.
Finally, just create a corresponding automation for when the light should turn on. You can add many automations per device.
Other Considerations
Ensure that the WiFi connection is stable to avoid interruptions in communication between devices. This plug will not work if the internet is down.